Building Sunshine
Installing the first strips
 Installing the First Strips |
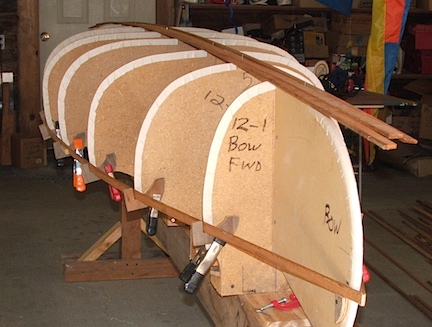
The first strip (the sheerline strip) is attached to the station molds starting with the center mold and working toward the stems. The cleats and clamps hold the strip securely to the molds. This strip is placed so it is level with the waterline (since there is no waterline indicated here, it is level with the floor). The end of the first strip is cut on an angle that is in line with where the strip on the other side will go. The two strips are glued together at the ends. This procedure is repeated for each pair of strips |
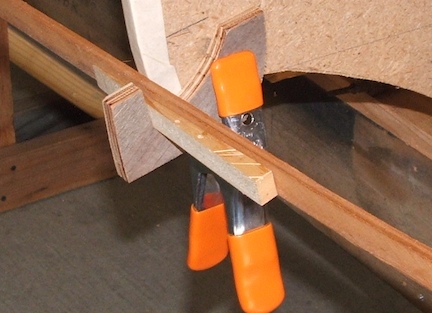 Cleats and wedges hold the strips in place. |
Alignment of this first strip is very important as all the others will follow the lines of this sheerline strip. I would find that using "C" clamps to hold the cleats at the sheerline, and the spring clamps with their wedges and cleats for subsequent strips, makes the work go more smoothly. Here we can see that the cove on the strip is facing up. This way we can apply a thin bead of glue into the cove for gluing the next strip. |

Second (or first glued strip) is in place. |
Here are the many clamps, cleats, wedges and shims in place to hold the first glued strip secure in its proper position. This will be my first experience building a stapleless canoe. The process will take more time as only one strip on each side can be installed per day. (Ted Moores, in his book, Canoecraft, describes how to install three strips at one time. I'm not going to tackle that one...yet.) The picture below shows ten strips installed, all one at a time. It has been working very well so far. Click this image for a larger view |
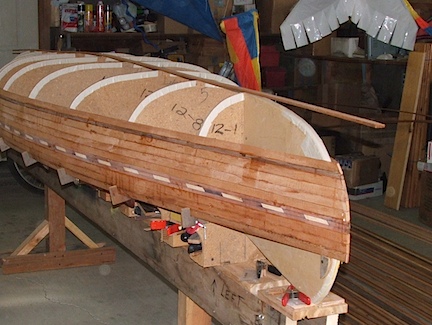 The accent strip is glued in place. |
The accent strip was quite a project all in itself. It is made with redwood and pine. Each strip contains 57 pieces, all glued together on the work bench. It turned out to be more difficult to install because of its stiffness. We'll see how she looks when we're all done. The dark strip above (I should say below, at about the maximum loaded waterline) is redwood. |
HTML validated
-
Lets iCab
![]() smile
smile