Building Sunshine
Gunwales, Decks and Yoke
 Images on this page
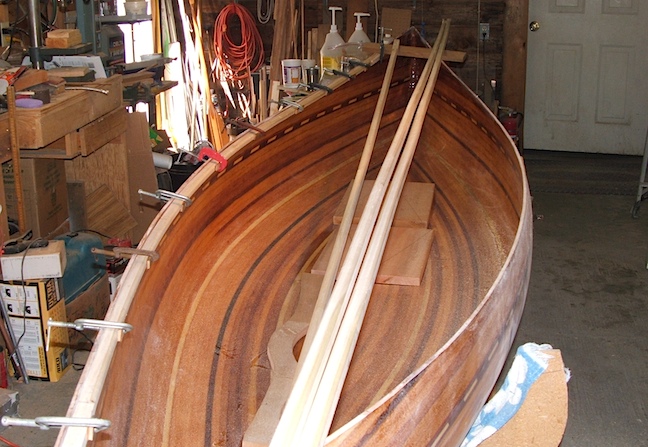 Setting up the gunwale strips |
The gunwale strips are ripped from a 1"x6"x7/8" board of poplar. I used this wood on my first strip canoe on the gunwales, seats and yoke, and it worked out well. After sanding, the strips are 3/4" square. I routed a round-over on the two edges of each strip that face away from the hull. The inner sides of the inwales will have scuppers between the yoke and the seats. Also, the inwales will end two or three inches into the decks instead of going all the way to the stems. Here I'm trying out the inwale to find if it will bend to the sheer line. |
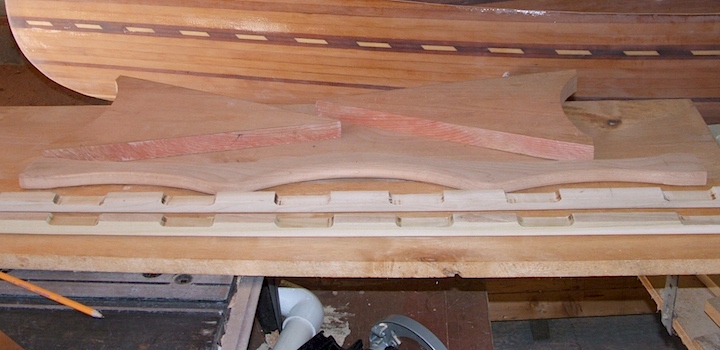 Decks, yoke and scuppers |
It appears as though all the parts are coming together now. Here are the inwales with the scuppers cut, the yoke all sanded and ready for varnish, and the rough cut decks. Notches will be cut into the squared-off corners of the decks where the inwales will extend in two inches. There is just a little more shaping and sanding to do on the decks. |
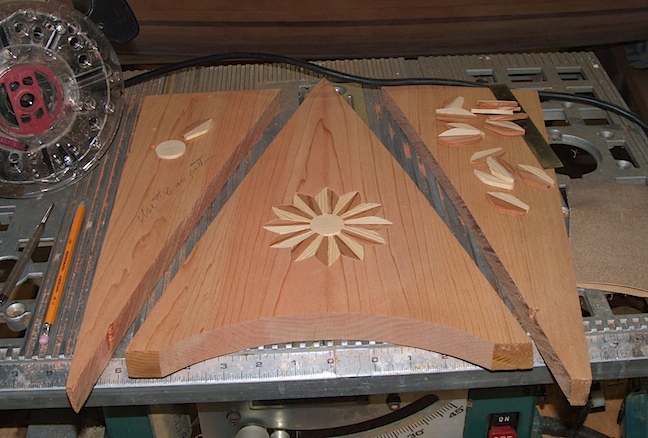 Sunshine wood inlay |
And, of course, the "Sunshine" wood inlay work on the decks. The decks are made from a piece of western red cedar which is 1" thick. Routing the recess for the inlay went quite well as the wood is soft and I did not get any ragged edges. The decks and scrap pieces are stuck with double stick tape to the table saw to keep them stable while routing. The inlay pieces will be epoxied into the decks then sanded to a smooth surface. |
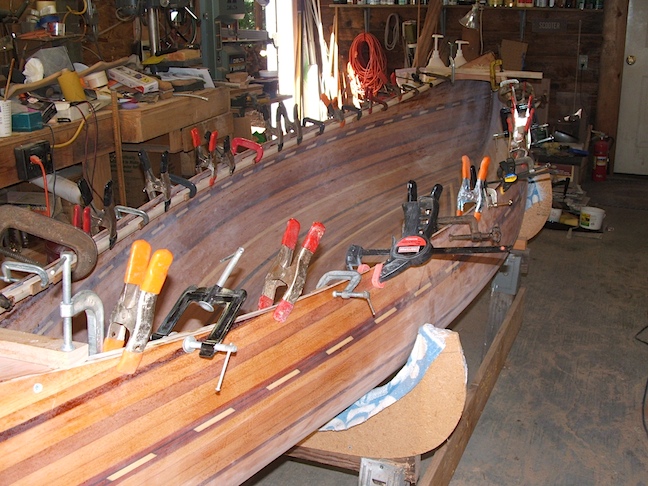 Installing the Inwales and Decks |
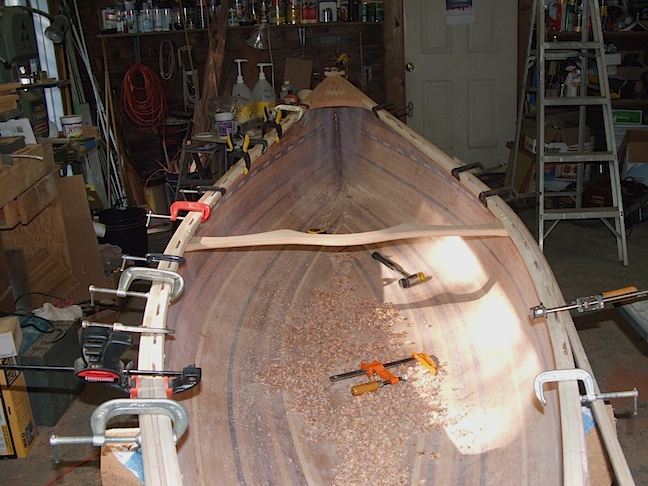
Are there enough clamps here? I had to dig into the old "C" clamps that my grandfather gave me just to make sure I had the inwales pulled in all the way. The decks and inwales are glued with epoxy resin and hardner mixed with some coloidal filler for thickening. Because of the rise in the sheer line it took the work of the cross bars and clamps to pull the inwales up to mate with the notches (see deck photo below) at the corners of the decks. |
 Installing the Outwales |
The outwales are held in place with almost as many clamps as the inwales. Here they are being lined up with the hull and the inwales. The outwales are fastened to the hull with 1-1/4" flat-head stainless steel wood screws which are turned in through the inwale and into the outwale. The screw holes will be plugged. The yoke in temporarily installed with #10-24 SS machine screws, flat washers and nyloc nuts. |
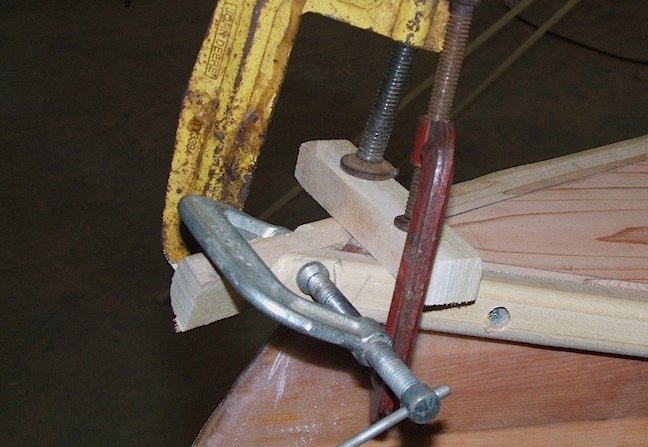 Cranking up the Outwale ends |
I have left the outwales a little long here to give me some material for my "C" clamp to bite into. Quite a lot of pressure is required to bend the outwales up at the stem and pull them in tight to the hull. It may be a little more tedious to shape the ends after they are glued and screwed to the hull but, it's been lots of work already. The clamps will stay in place until after the epoxy glue has cured. The screw holes will be plugged with the same wood, poplar, as the gunwales. |
 Sunshine's Deck |
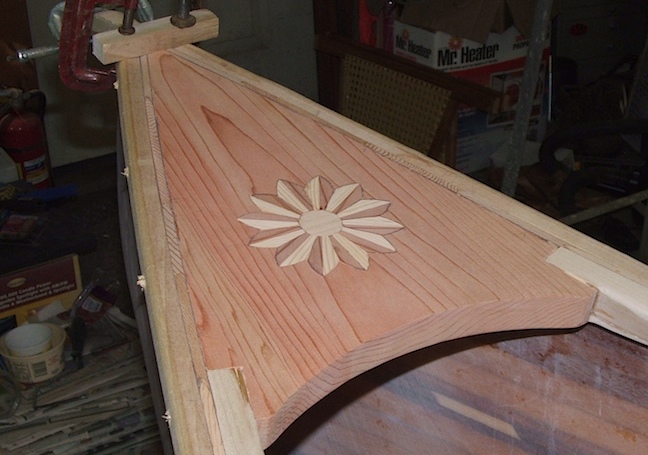
Here is the completed deck with the inlay wood epoxied in and rough sanded. This picture shows how the inwales extend into the deck. I prefer not to take the inwales all the way to the stem as that cuts down the size of the deck—one of the focal points of any cedar strip canoe. Everything needs a little more sanding but we're getting close to the final construction stages. |
 Ends of the Outwales |
As it turned out the shaping of the outwale ends was not so bad after all. A little carving and some sanding and the shape is just about what I had expected. The thickened epoxy glue and the flat-head screws pulled the outwales in to the hull very nicely. |
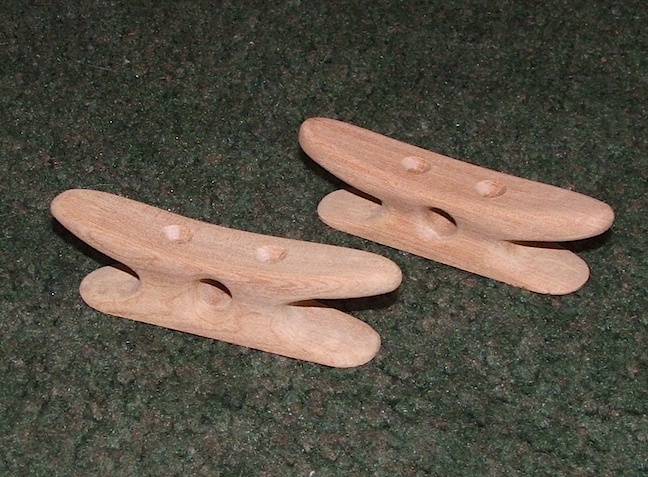 The Deck Cleats |
The deck cleats for Sunshine are made of wood like the canoe itself. The cleats shown here are not quite finished with a little more sanding needed, and an application of Swedish Wood Oil. I had planned to use brass cleats as indicated on my Plans page, but I decided to carve these out of a piece of leftover Oak. They are 3-1/2" long by 1" high and are made for the 1/4" painter line that I'll use with this canoe. I think they will blend more smoothly with the woodwork of the decks. |
 The Carrying Yoke |
Here is a dry fit of the carrying yoke. The shape design is much the same as on my 16' canoe except this one is about 1/2" narrower. It will be fastened to the inwales using #10-24x2" SS round-head machine screws, flat washers and nyloc nuts. The bolt heads are counter-bored into the inwales and the holes will be plugged with 5/16" wood plugs. |
 The finished Deck Cleat |
|
Making the Sunshine wood inlays |
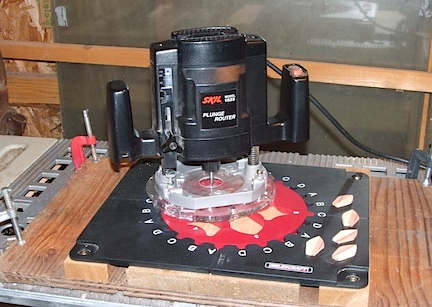 Routing the wood inlays |
The Router I'm using here is a Skill Model 1823 and the inlay template is from the Milescraft Model 1207 Design/Inlay kit. A few of the inlay pieces that make up my sun are on the design guide (black). They are cut with the 11.1mm insert, from 1/8" thick pine/redwood strips which have been glued together. The circular center of the sun is cut from a 1/8" piece of white cedar. The recess for the inlay is routed into the deck using the 17mm insert. The inlay pieces are fitted and glued into the recess. When the glue is dry everything is sanded to make a smooth finish. |
While routing the recesses in the deck material I found that I had to pass over the recess several times to clear away the wood. I decided to use my Dremel tool with a 1/8" bit and the router attachment. This one has a clear acrylic base so I was able to see into the recess and the wood I was removing. The Dremel, with the router attachment Model 335-01, is smaller and lighter than the large router. The Dremel arrangement is great for light work. |
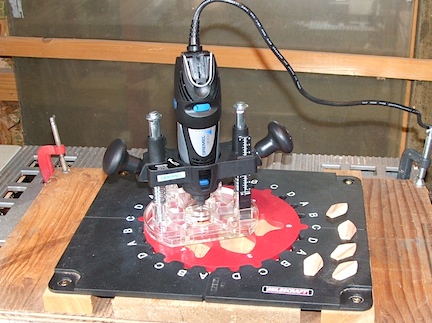 The Dremel router |
HTML validated
-
Lets iCab
![]() smile
smile